Hewoo guys!
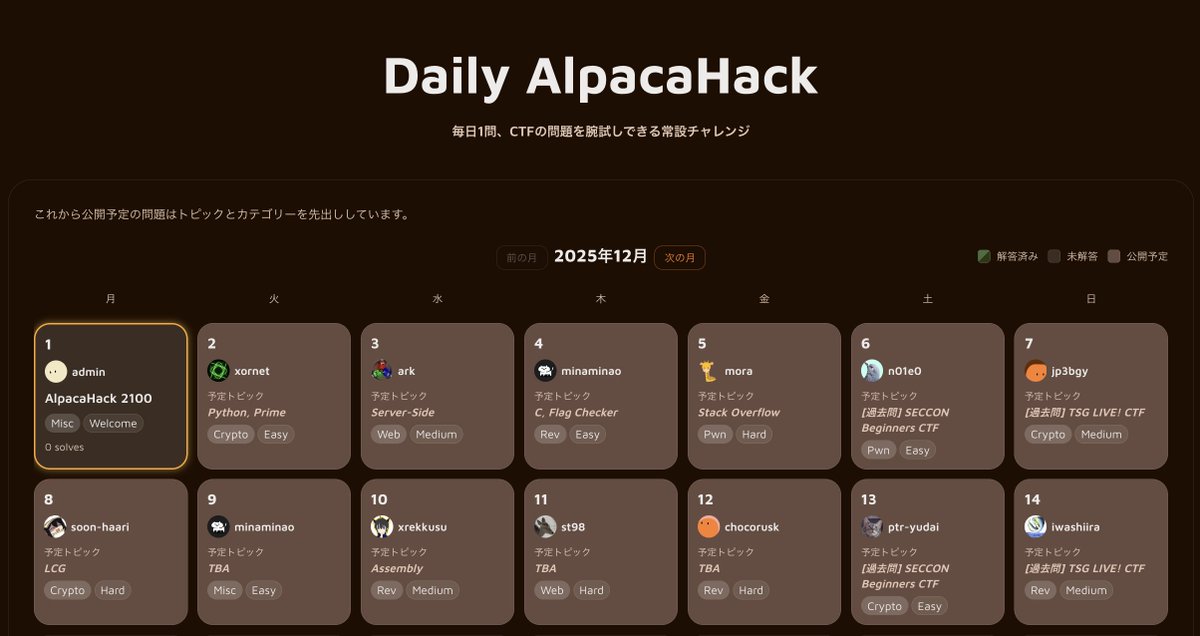
Today’s AlpacaHack daily challenge dives into Reverse Engineering. I’m still getting comfortable with reversing binaries, so let’s solve it!
Description
Translation
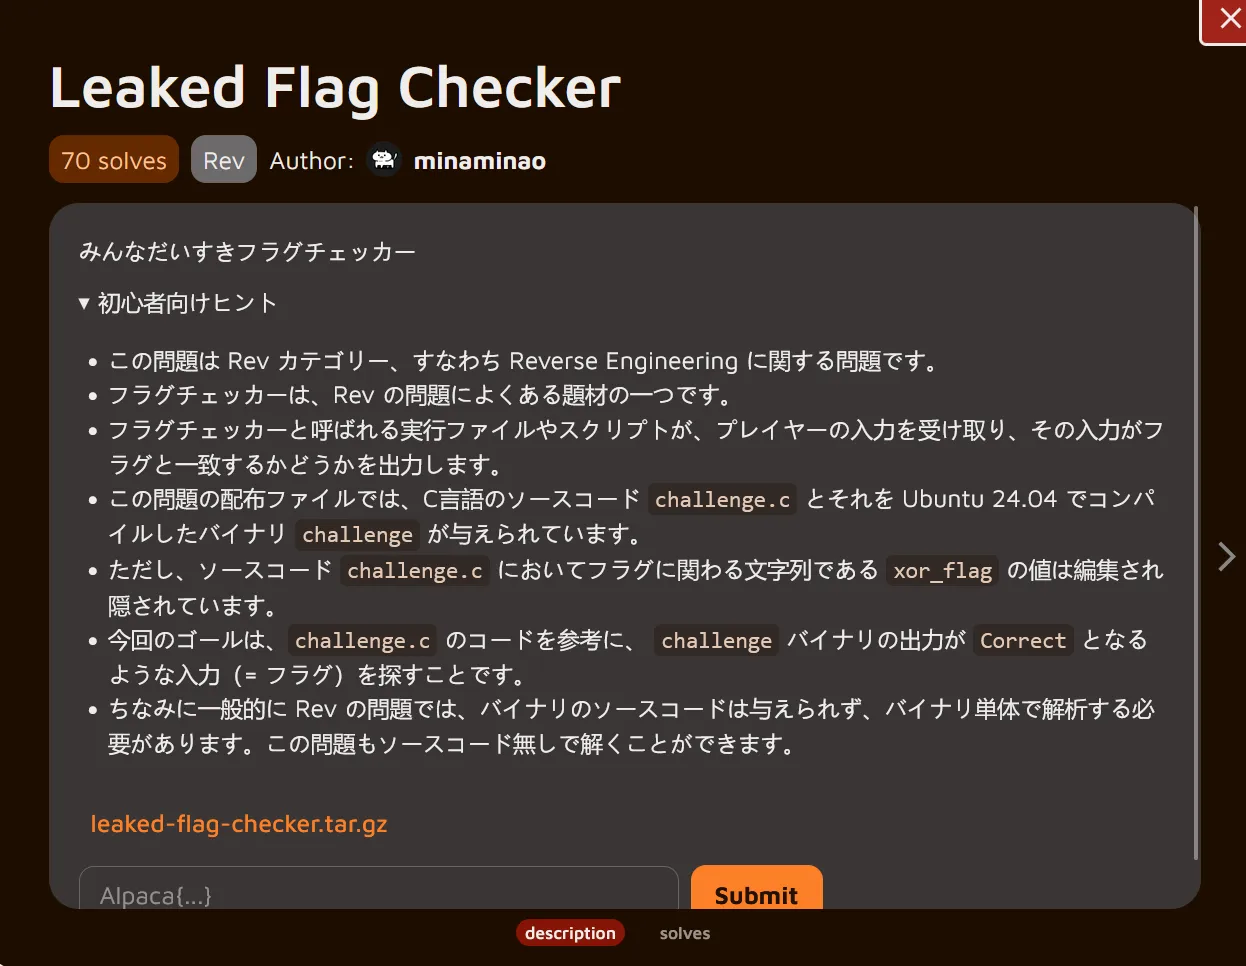
Everyone's Favorite Flag CheckerHints for Beginners
This problem belongs to the Rev category, meaning it's about Reverse Engineering. Flag checkers are a common theme in Rev problems. An executable file or script called a flag checker takes input from the player and outputs whether that input matches a flag. The distributed files for this problem include the C source code challenge.c and the compiled binary challenge for Ubuntu 24.04.However, the value of xor_flag—the string related to the flag in the source code challenge.c—has been edited and hidden. The goal is to find input (i.e., the flag) that makes the challenge binary output “Correct,” using the challenge.c code as a reference. Note that in Rev problems, the binary source code is generally not provided, requiring analysis of the binary alone. This problem can also be solved without the source code.Understanding the challenge
We’re given a downloadable file, so let’s start by grabbing it and extracting its contents:
┌──(chjwoo㉿hackbox)-[~/…/ctfs/alpacahack/rev/leaked_flag_checker]└─$ wget https://alpacahack-prod.s3.ap-northeast-1.amazonaws.com/0bbdd0f6-3b81-4c67-9b16-1febd6641ec9/leaked-flag-checker.tar.gz--2025-12-04 07:20:21--  https://alpacahack-prod.s3.ap-northeast-1.amazonaws.com/0bbdd0f6-3b81-4c67-9b16-1febd6641ec9/leaked-flag-checker.tar.gzResolving alpacahack-prod.s3.ap-northeast-1.amazonaws.com (alpacahack-prod.s3.ap-northeast-1.amazonaws.com)... 3.5.159.68, 3.5.157.17, 3.5.155.225, ...Connecting to alpacahack-prod.s3.ap-northeast-1.amazonaws.com (alpacahack-prod.s3.ap-northeast-1.amazonaws.com)|3.5.159.68|:443... connected.HTTP request sent, awaiting response... 200 OKLength: 3131 (3.1K) [binary/octet-stream]Saving to: ‘leaked-flag-checker.tar.gz’
leaked-flag-checker.tar.gz                     100%[====================================================================================================>]   3.06K  --.-KB/s    in 0s
2025-12-04 07:20:22 (180 MB/s) - ‘leaked-flag-checker.tar.gz’ saved [3131/3131]

┌──(chjwoo㉿hackbox)-[~/…/ctfs/alpacahack/rev/leaked_flag_checker]└─$ tar -zxvf leaked-flag-checker.tar.gzleaked-flag-checker/leaked-flag-checker/challenge.cleaked-flag-checker/challenge
Now we have two files:
- challenge.c → likely the source code (nice, this will help a lot!)
- challenge → the compiled binary
With the files in place, it’s time to explore how the binary behaves and understand the flag-checking mechanism inside it.
Let’s run the binary to see what it does:
┌──(chjwoo㉿hackbox)-[~/…/alpacahack/rev/leaked_flag_checker/leaked-flag-checker]└─$ ./challengeEnter flag: AAAAAAAAAAAAAAAAAAAAAAAAAAAAAAAAAAAAAAAAAAAAAAAAAAAAAAWrong length
┌──(chjwoo㉿hackbox)-[~/…/alpacahack/rev/leaked_flag_checker/leaked-flag-checker]└─$ ./challengeEnter flag: AAAAAAAAAAAAAAAAAAAAAAAAAAAAAAAAAAAAAAAAAAAAAAAAAAAAAWrong length
No matter how many characters we input, the program keeps saying "Wrong length". We tried different input lengths but still got the same error. This tells us the flag has a specific length that we need to find.
Let’s first review the provided source code to understand the basic validation logic:
// gcc -o challenge challenge.c#include <stdio.h>#include <string.h>
int main(void) { char input[32]; const char xor_flag[] = "REDACTED"; size_t flag_len = strlen(xor_flag);
printf("Enter flag: "); fflush(stdout); scanf("%31s", input);
if(strlen(input) != flag_len) { printf("Wrong length\n"); return 1; } for(size_t i = 0; i < flag_len; i++) { if((input[i] ^ 7) != xor_flag[i]) { printf("Wrong at index %zu\n", i); return 1; } } printf("Correct\n"); return 0;}Each character of the input is XORed with 7, then compared to an encrypted string. Our job is to find that encrypted string inside the binary.
Before opening the binary in a disassembler, let’s identify what kind of file it is:
┌──(chjwoo㉿hackbox)-[~/…/alpacahack/rev/leaked_flag_checker/leaked-flag-checker]└─$ file challengechallenge: ELF 64-bit LSB pie executable, x86-64, version 1 (SYSV), dynamically linked, interpreter /lib64/ld-linux-x86-64.so.2, BuildID[sha1]=5d2c86ed744df49647f3bd9cee8cfc4a90041315, for GNU/Linux 3.2.0, not strippedThe binary is a 64-bit PIE ELF, dynamically linked, and importantly — not stripped. This means symbol information is still present, making reverse-engineering significantly easier in tools like IDA Pro or Ghidra.
Since the binary is not stripped, we can open it in IDA Pro and get clean decompiled code. After renaming variable v5 to flag for clarity, here’s what we find:
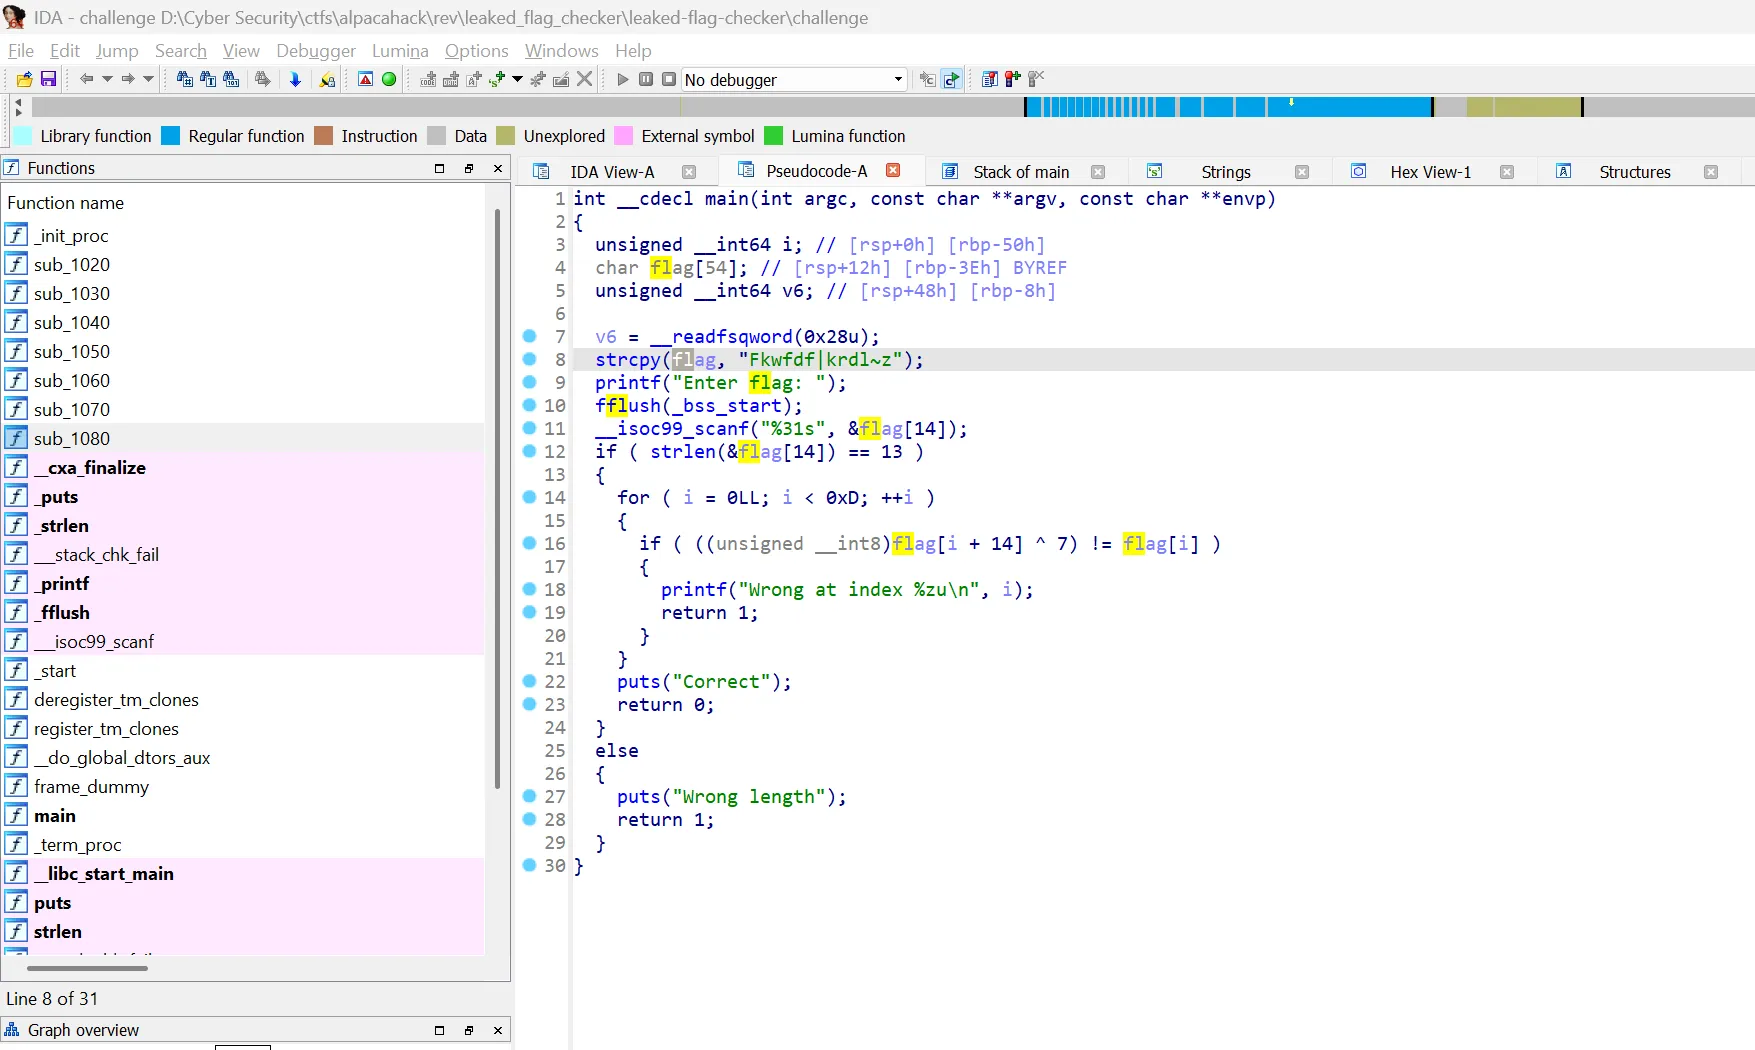
Now we can see what’s really happening:
- Buffer size: 54 bytes allocated for
flag - Encrypted flag:
"Fkwfdf|krdl~z"stored atflag[0](13 characters) - User input: Stored at
flag[14](offset 14) - Expected length: 13 characters (
strlen(&flag[14]) == 13) - Validation: Compares
flag[i + 14] ^ 7withflag[i]
The real challenge was inside the binary.
Solution
To recover the original flag, we simply need to reverse the XOR operation:
original_flag[i] = encrypted_flag[i] ^ 7Since we have the encrypted flag "Fkwfdf|krdl~z", we can XOR each character with 7 to get the original flag. So this is my solver:
enc = "Fkwfdf|krdl~z"flag = []
for char in enc: flag.append(chr(ord(char) ^ 7))print("".join(flag))Running this solver gives us the decrypted flag:
┌──(chjwoo㉿hackbox)-[~/…/alpacahack/rev/leaked_flag_checker/leaked-flag-checker]└─$ python solver.pyAlpaca{lucky}Flag
Alpaca{lucky}